
Shadow Tower is a timed climb with enemy waves, boss floors, and rewards including runes and ore. Bring a Tower Ticket and equip both armor slots before heading to the purple portal.
Get a Ticket and Start Floor 1
Where to get Tower Tickets
Daily Rewards and reward-track milestones give you specific ticket targets to work toward. The Lucky Wheel offers a chance-based alternative.
| Source | Requirement or reward | Tower Tickets |
|---|---|---|
| Daily Rewards | Day 2 | 1 |
| Daily Rewards | Day 4 | 2 |
| Daily Rewards | Day 6 | 3 |
| Lucky Wheel | Ticket prize; 10% chance per spin | 5 |
| Season 1 PHANTOM | Free Tier 3 | 3 |
| Season 1 PHANTOM | Premium Tier 4 | 10 |
| Bounties | Bounty 25 milestone; also includes a Rare Rune | 2 |
| Eclipse Bundle | Included bonus | 50 |
After ordinary boss fights, look for Tower Tickets among the available loot. A ticket can appear in the Magmaw arena after a victory; treat this as an extra opportunity rather than a guaranteed ticket per kill.
Enter the tower
- Have at least 1 Tower Ticket ready.
- Go upstairs to the purple portal and approach the glowing platform in front of it.
- Open Shadow Tower and select the 1–5 entry bracket.
- Press Start to spend 1 ticket and begin on Floor 1.
With Highest Floor 0, the initial 1–5 bracket is available and later entry brackets are locked. The 1–5 label does not cap your run at Floor 5: you can defeat Gatekeeper and continue to Floor 6 and beyond.
Prepare Both Armor Slots and Keep Moving
Before spending your ticket, equip a helmet and body armor:
- Open Backpack > Armor.
- Select your helmet and equip it.
- Select your body armor and equip it too.
- Equip the weapon you intend to use for the climb.
Compare the Health on your owned armor pieces. Filling both slots gives you more room to survive hits; the armor guide covers sources, individual stats, and enchantment slots.
Two useful setup examples show how armor fits into a run:
- Early climb: Royal Spire with Iron Mail provided a setup with 140 maximum health that reached Floor 11.
- Later Floor 20 attempt: Crimson Oath with +67 Health and Crimson Crest with +33 Health added 100 Health in total, with Triplet equipped for the attempt.
These are equipment examples, not minimum health requirements or guaranteed floor clears.
During combat, keep moving while firing so enemies cannot surround you. Use pillars as cover and pick off smaller enemies before committing to a boss. Later floors bring faster enemies and larger health pools, so maintaining space becomes increasingly valuable.
Clear Floors and Watch the Timer
Shoot the enemies on the current floor, then wait for the Next floor countdown to finish. The number beside that message counts down toward the transition; use the separate Floor label to track where you are. During combat, watch the remaining time at the top of the screen.
These encounter examples help you recognize the enemies along the climb; they are not exclusive spawn assignments.
| Enemy | Example encounter floors |
|---|---|
| Shadow Acolyte | 3 and 5 |
| Darkling | 3 |
| Night Imp | 4 |
| Shade | 4, 7, and 11 |
| Shadow Archer | 6 |
Shade is the black humanoid with glowing purple eyes, a wide grin, and long claws. Keep clearing smaller enemies even on boss floors—leaving them alive adds pressure while you are trying to aim at the boss.
Gatekeeper on Floor 5 and Night Knight on Floor 10
Floor 5: Gatekeeper
Look for the boss in dark blue armor carrying a large golden key. Shoot Gatekeeper while managing the other enemies on the floor. Defeating it lets you continue to Floor 6, and its rewards include a rune and ore.
Floor 10: Night Knight
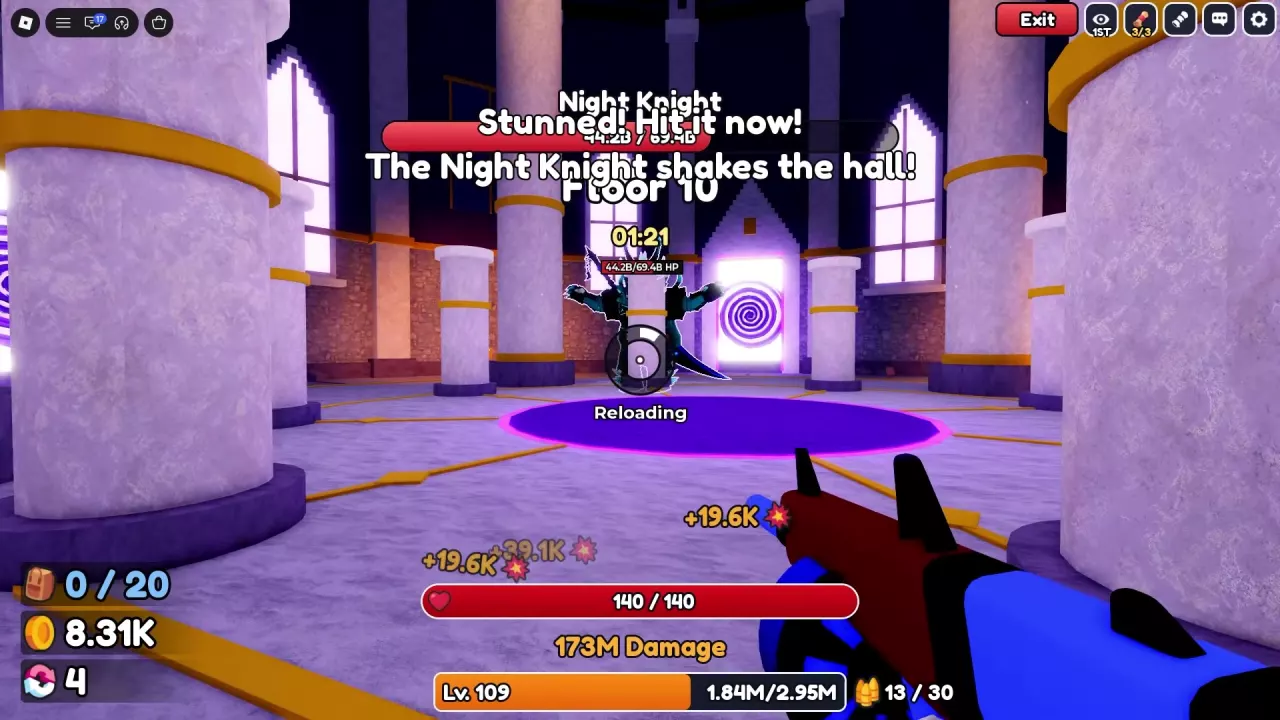
Night Knight wears black heavy armor with cyan spikes and trim. It summons additional enemies and has a stun window you can use to focus damage.
- Move between pillars and use them as cover.
- Clear the smaller enemies so they do not crowd you during the boss fight.
- When “Stunned! Hit it now!” appears, concentrate fire on Night Knight.
- Deal with newly summoned enemies, then return your attention to the boss when you have space.
Clearing the encounter opens the way to Floor 11. Use the stun message as your cue to attack rather than staying exposed throughout the fight.
Gargoyle King on Floor 20
Gargoyle King appears on Floor 20, in a timed fight with other enemies in the arena. Keep track of the combat timer while handling both the boss and the surrounding enemies.
The encounter includes the message “The Gargoyle King opens the lanes!” Watch for this cue during the fight and maintain space to move among the other enemies.
Exit, Give Up or Use the Revive Option
To stop climbing during a run, use Exit at the top right of the screen.
After “YOU DIED..”, the death menu offers two choices:
- Give up: End the attempt and return to the lobby.
- Revive: Use the revival option to continue. If the button displays FREE, that offer applies to the current revival; it is not a promise of unlimited free revives.
Tower rewards include runes and ore. A Floor 7 attempt ended through Give up with Iron ore brought back to the lobby, while an early climb ending at Floor 11 brought back runes. Those outcomes do not establish that every reward is retained through every exit method.
Use runes for equipment enchanting. Compare their uses in the rune guide, then follow the enchanting steps to apply a rune to your equipment.